Set Up Website Visitor Tracking
Last updated Dec 10th, 2025
Website visitor tracking allows you to gain rich signal by understanding who is viewing your website and documentation. This guide will walk you through the process of setting up tracking, identifying known users, and maximizing your data collection.
Before you begin, ensure you have:
- Administrative access to your website's codebase (not required for the basic Google Tag Manager setup)
- An understanding of basic JavaScript and web analytics (not required but recommended)

Availability
Website visitor tracking is available on all plans.
Step 1: Installing the Tracking Snippet
- Log in to your Common Room account and navigate to Settings.
- Click on the "Signals and integrations" tab.
- Select "Website visits" to find your unique tracking snippet.
Once you have your tracking snippet, choose one of the following methods to add the tracking snippet:
Option A: Direct Installation
- Copy the provided snippet from your Common Room settings.
- Paste it within the <body> tag of your website's HTML.
Example:
<script>(function() {
// Paste your unique tracking snippet here
})();
</script>
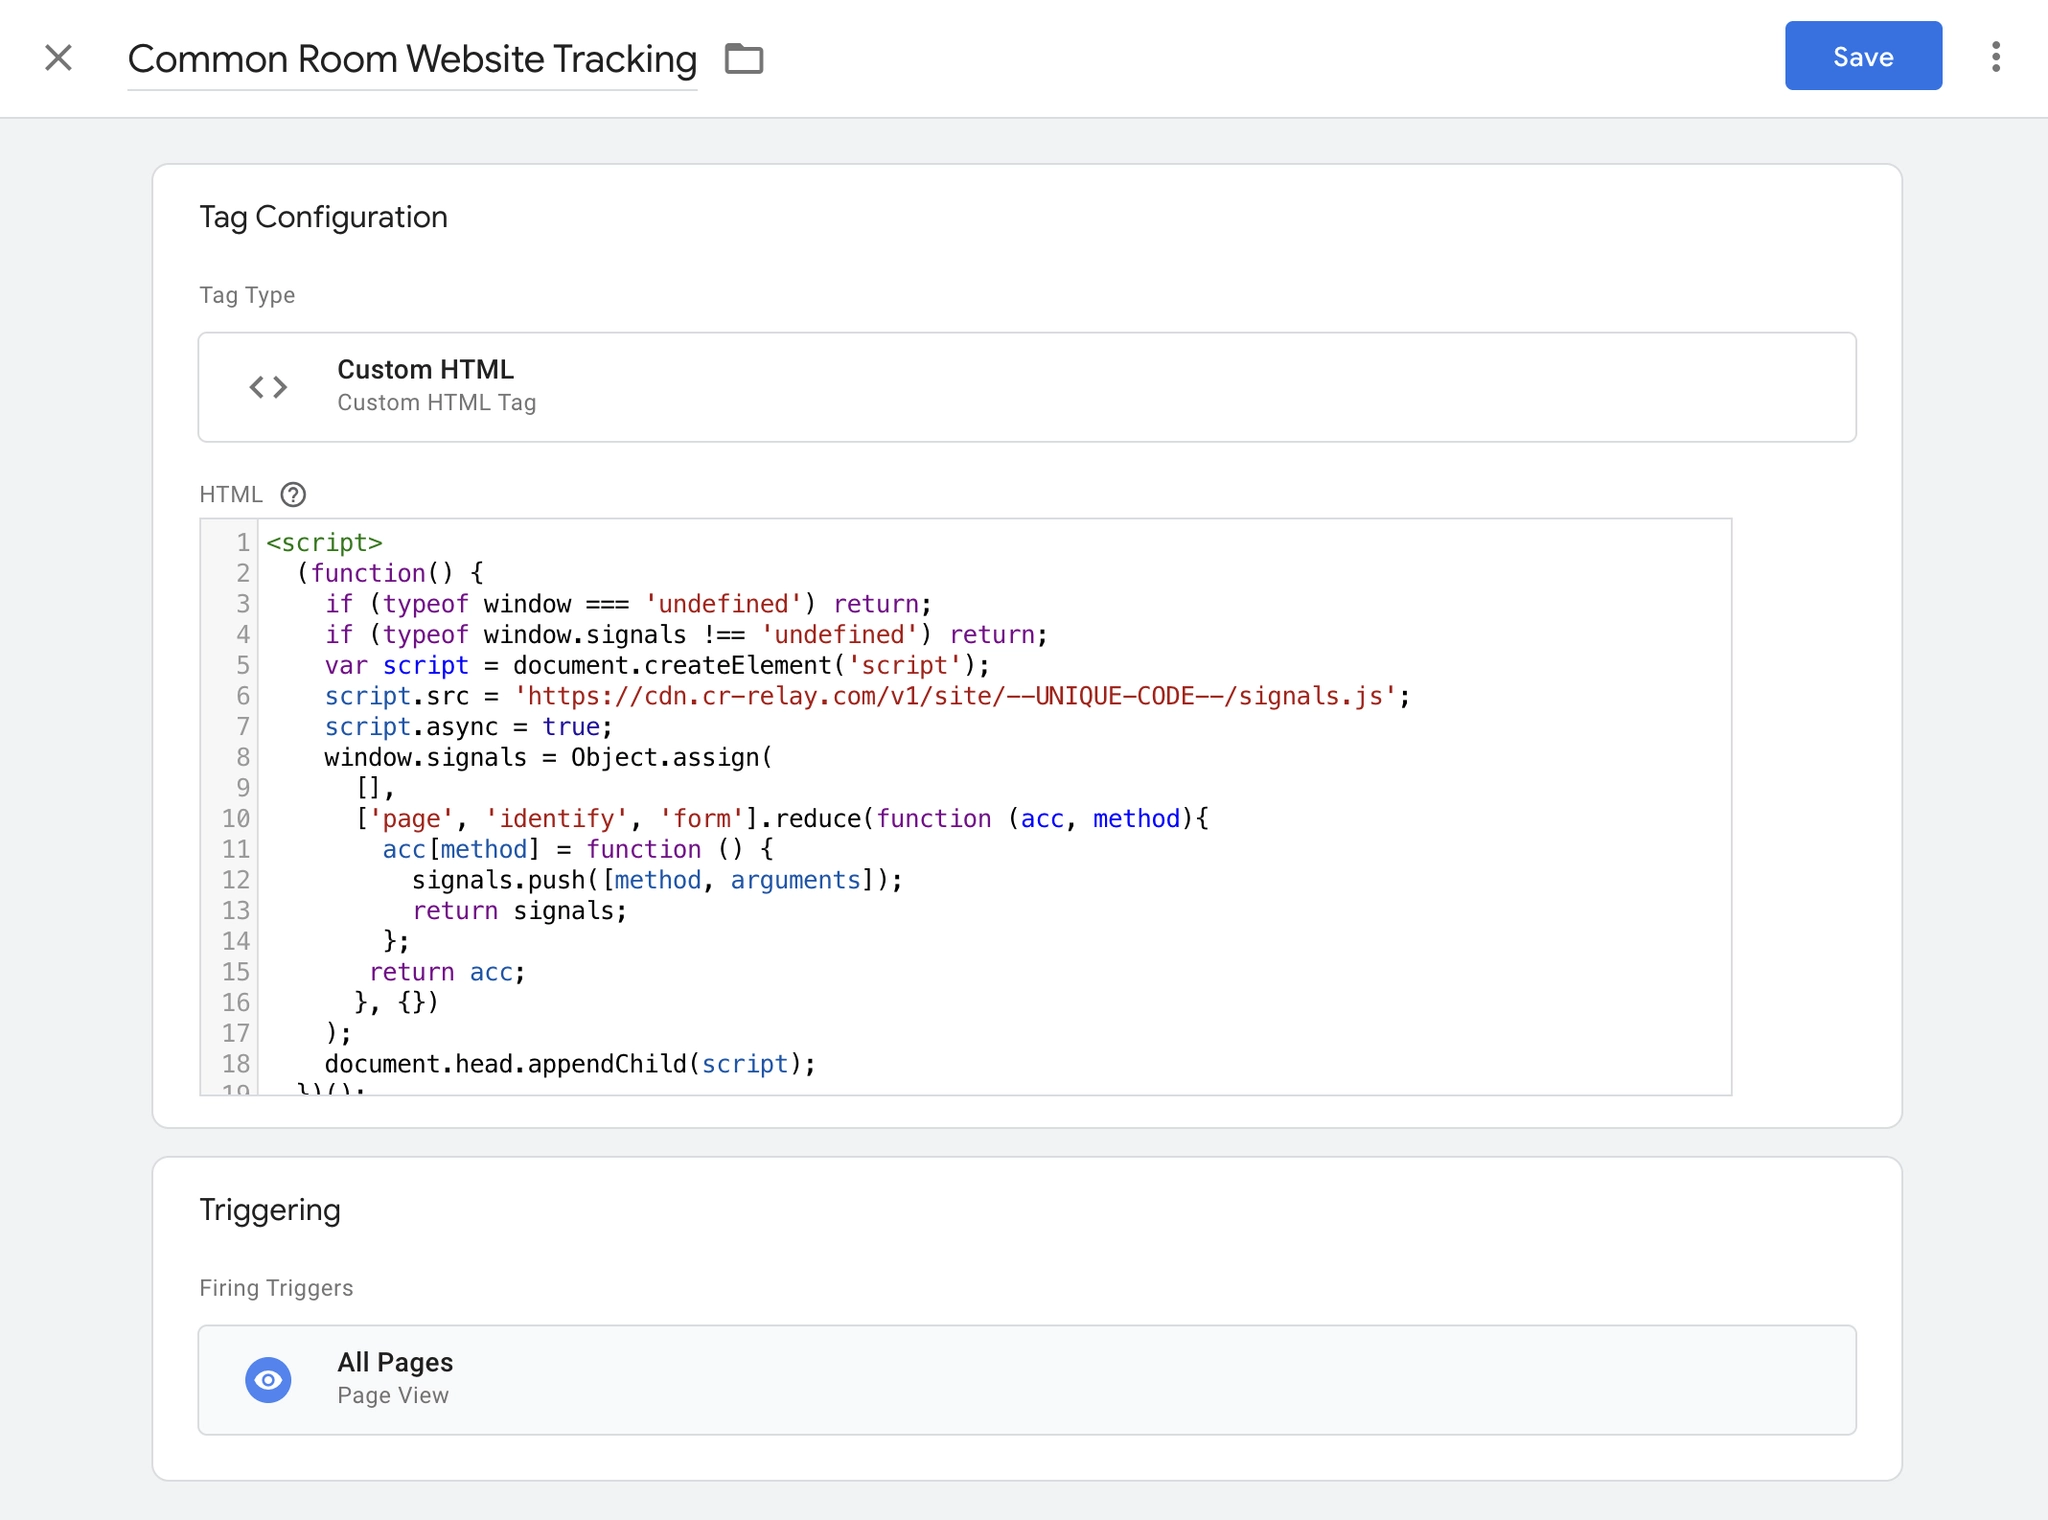
</body>Option B: Using Google Tag Manager
- In Google Tag Manager, create a new tag of type "Custom HTML".
- Paste the tracking snippet into the tag.
- Set the trigger to "All Pages".
- Save and publish your changes.
Option C: For React/Next.js/Gatsby Applications
Add the script to a high-level component:
import React from 'react';

const Layout = ({ children }) => (
  <div>
    {children}
    <script dangerouslySetInnerHTML={{
      __html: `Tracking snippet here (avoid duplicate <script> tags)`,
    }} />
  </div>
);

export default Layout;
Step 2: Identifying Known Users
In order to identify the users who might have visited your website, it's important to be able to associate their anonymous visit information (ex: IP address) with identify information (ex: an email or name).
Enable our Enhanced US visitor tracking option to immediately start identifying US-based visitors to your website. Enabling this option will automatically update the code snippet from Step 1 to leverage web visit identification technology from our partner Vector.
To further improve your ability to identify web visitors, instrument places on your website where this information is available to create the connection between the anonymous visitor and identity.
Tip: Implementing identity calls has been shown to increase deanonymization rates by over 50%
If your website accepts form submissions from users (ex: entering emails in order to get access to a case study, a demo-request form, etc), that presents an opportunity to instrument your code to identify users. Or, when your users log into your product is another opportunity to instrument identification code. This assumes that users enter valid email addresses, visits are matched to whatever email is provided.
For forms that use standard email or name fields, the Common Room SDK will automatically attempt to de-anonymize users. While Common Room will detect this data most of the time there may be times when you need to do this by adding the following line of code when you have an email available:
window.signals.identify({ email: userEmail })
Below are a few examples of how this call would manifest itself in your website’s code.
Example: Identifying a User After Form Submission
function onUserLogin(user) {
  // Your login logic here

  // Identify the user with Common Room
  window.signals.identify({
    email: user.email,
    name: user.fullName
  });
}
Example: Identifying a User After Login
function onUserLogin(user) {
  // Your login logic here

  // Identify the user with Common Room
  window.signals.identify({
    email: user.email,
    name: user.fullName
  });
}
From your marketing website or your app website, you can issue an API call to identify a user by their email. The same script will work on both your marketing and app website.
It's important to note that this setup only works when both sites share the same root domain (eg. commonroom.io and app.commonroom.io). When the domains are different, visitors sessions cannot be shared.When instrumented correctly with the same root domain, a person who visits your marketing site anonymously and then submits a form or logs into the app will be de-anonymized. However, if the root domains are different, we won't be able to link marketing site page's visits to that identity, and they will remain anonymous.
Step 3: Link Tracking
You can achieve even higher visibility for individual visitors to your website by tracking clicks on links in marketing and sales messages sent to your customers and prospects. You will need to add a parameter to links within message templates in your marketing and sales tools.
Tip: Implementing UTM tracking has been shown to increase deanonymization rates by over 50%
Add the URL Parameter
At the end of each link add the URL parameter cr_email={{email}} using whatever email token is correct for your system.
Email Token/Variable
Email address variables from tools you might be using:
1. HubSpot uses {{contact.email}}
2. Apollo.io uses {{email}}
3. Outreach uses {{email}}
4. Salesloft uses {{email_address}}
Encoded Email Address (optional)
You may prefer to encode the email address. For example, HubSpot uses the following variable for base64 encoded emails: {{contact.base64_email}}
You will need to use an alternate URL param: cr_e={{email}}
TIP: How to Add Parameters Correctly
If this parameter is the first, you will need to add a ? at the beginning.
https://example.com/pricing/?cr_email={{email}}
If the parameter follows others (like UTMs) you will need to add a & like so:
https://example.com/pricing/?utm_source=cr&cr_email={{email}}
We do not recommend instrumenting your web application pages. This leads to a large amount of traffic and is likely low value to your team.
FAQs
What info would Common Room tracking provide for existing customers or prospects once we capture them via a form?
When we get the conversion event, we can correlate it with any historical website visits where the user was anonymous, and then blend this with any other signal being captured in Common Room.
For example, if a person visits the integrations and pricing page on your website and then fills out a form 3 days later, Common Room can connect all those dots and show the person's profile post-facto such that you're able to see the historical activity versus just the conversion event, which is what you'd typically see in Salesforce, Hubspot etc.
More importantly though, this is all pulled into the Person360 profile for the contact across all your signals, so website activity is just one of dozens of signals that are captured in the platform at the individual and organizational level, and this is where customers find the most unique and differentiated value.
Does the tracking snippet need to be embedded in the forms of our site?
If you only want to track forms on the website where you're already running our script then no additional actions needed. Our script automatically tracks form submissions that contain an email field. That email field is used to de-anonymize the contact.
If you want to use your product logins to de-anonymize visitors as well, then you'll need to install the script on your app's site as well (which is different from your marketing site) and add an "identify" call to your app code as described in step 2 of this guide. The email passed to that "identify" call is what will be used to de-anonymize the visitor.
Does Common Room drop cookies?
Website visitor tracking does not use any 3rd party cookie. Common Room does create our own 1st party cookies used to correlate user visits to different pages.
Does visitor de-anonymization work across different domains? I have multiple domains and want to track visitor activity across them.
The behavior depends on whether you're tracking across different root domains or subdomains of the same root domain:
If the root domains are different (e.g. commonroom.io and getcommonroom.com):
- The tracking snippet works independently on each root domain
- A visitor identified on commonroom.io remains anonymous on getcommonroom.com until identified there
- You need to implement identification methods (forms, logins, email tracking) on each root domain
- Once identified on both domains, their visits will be combined in their contact profile
If the domains have the same root domain (e.g. www.commonroom.io and app.commonroom.io):
- The tracking snippet works across all subdomains of the same root domain
- When a visitor is identified on one subdomain or the root domain, they are automatically identified across all subdomains
- You don't need to implement identification methods (forms, logins, email tracking) on each subdomain
- All visits are automatically consolidated on their contact profile
I've gone through all the steps above but no web visits are being tracked in the org or contact explorer. What can I do to troubleshoot?
In your web visit signal settings, the “Last event recorded on” field will typically be blank if the signal has been misconfigured. Prior to reaching out to support@commonroom.io for assistance, we recommend trying to debug the behavior using tag manager.